Last Updated: 2025-01-31 19:20:29
Webinar Replay: Getting Started with Curator
InterWorks
September 13, 2021
Here at InterWorks, we love immersive experiences, which is why we are so passionate about our Curator solution. With Curator, we are helping clients build a truly immersive experience within Tableau for their end users. A more immersive, all-encompassing experience is more approachable and, in turn, more effective for your users.
By now, you probably have visited our Curator site and seen a whole host of beautifully designed sites that showcase the features and functionality of Curator. If you haven’t, head over there and take a look at the gallery of sites for inspiration!
For those of you who have already installed Curator, you may be looking at a site like this and see all the work it needs:
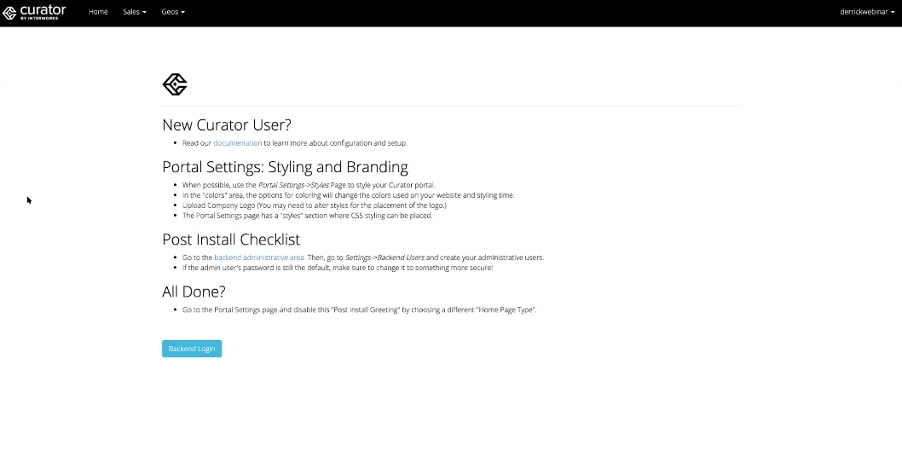
So the question is: How do we get from Point A to Point B? Hopefully this post will give you some answers and food for thought. You may be working with the InterWorks Support Services Team, but we wanted to make everything super slick so that you can remain in control to tweak and change as your heart desires.
Let’s begin with Curator’s control panel:
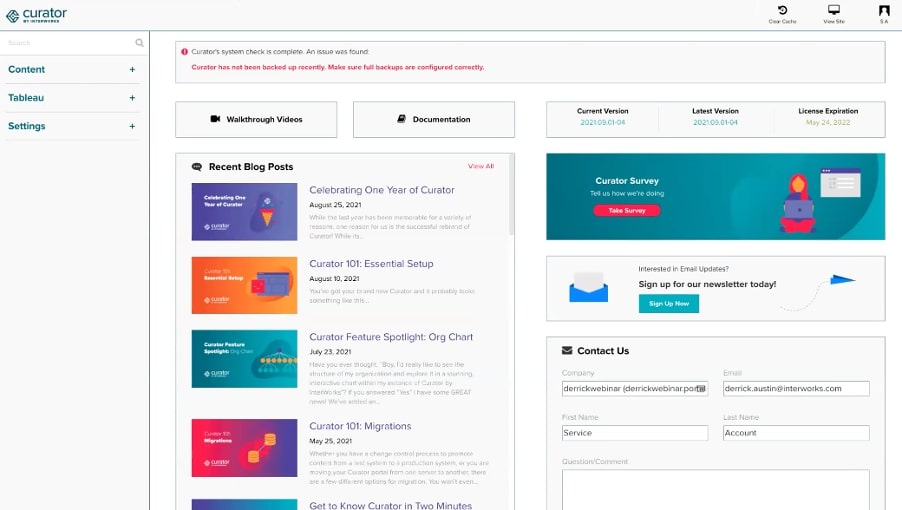
Spot an issue? Great! This is the Curator site’s status screen, so if you have any issues with the site, this is where you will be notified. Having these notifications when you log in is super helpful to ensure that your site is working efficiently.
So where to start? You’ll see some super useful content on this page, too. We aimed to create content to suit all learning styles, so we have some helpful walkthrough videos, some documentation and – our personal favorite – blog posts.
Custom Navigation Options
You’ll then notice the informative navigation panel on the left that expands out so you can see exactly how to begin:
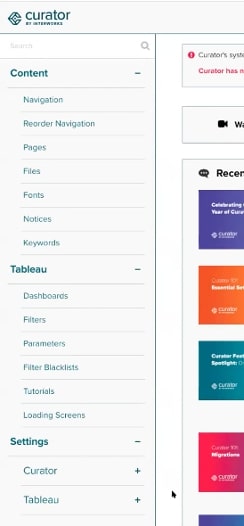
Let’s start with the Settings tab. How do we start getting the site to look like our brand? Head over to the PortalSettings tab to start branding!
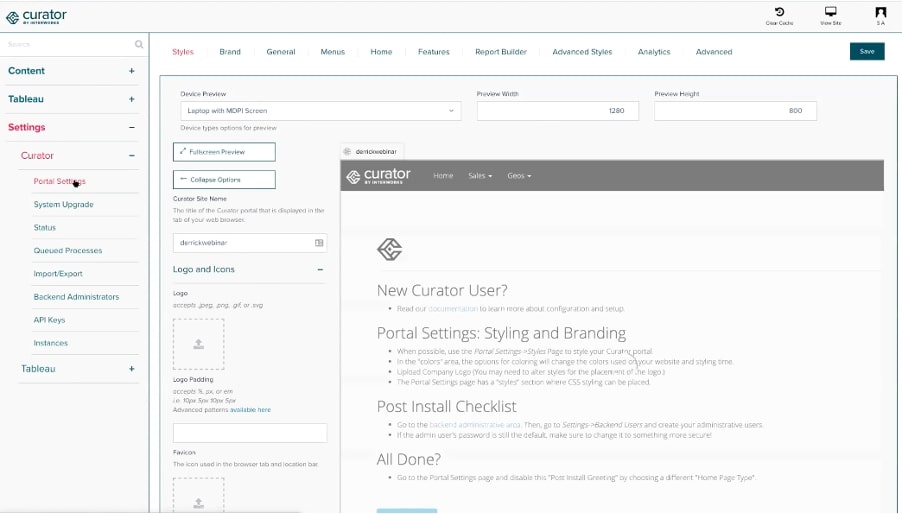
The minute you start inputting your requirements, such as logo or site name, you’ll see those updates in real time in the preview pane, just like you would in a browser. You can use this tab to select your branded color scheme or change the navigation so that your users can interact with the site in a way that they feel most familiar with.
You can even customize your menu types; maybe you want to go from a Top Navigation Menu to a Mega Menu or a Side Navigation Menu. Once you have played with the settings, we can then start looking at getting the all-important content added:

Within the Curator site, we have simplified the format options to give you some presets to choose from or the freedom to freestyle. One of our favorite options is to select three dashboards then the most favorited and featured as chosen by your users.
Alternatively, you could give your site’s Home Page a more unique look and feel by adding in some text, imagery or icons with a more advanced feel, which can be done in the Pages section:

There are so many possibilities for customization, and we have built these in on the Features page, so that you can play and shape the site so that it works best for you:
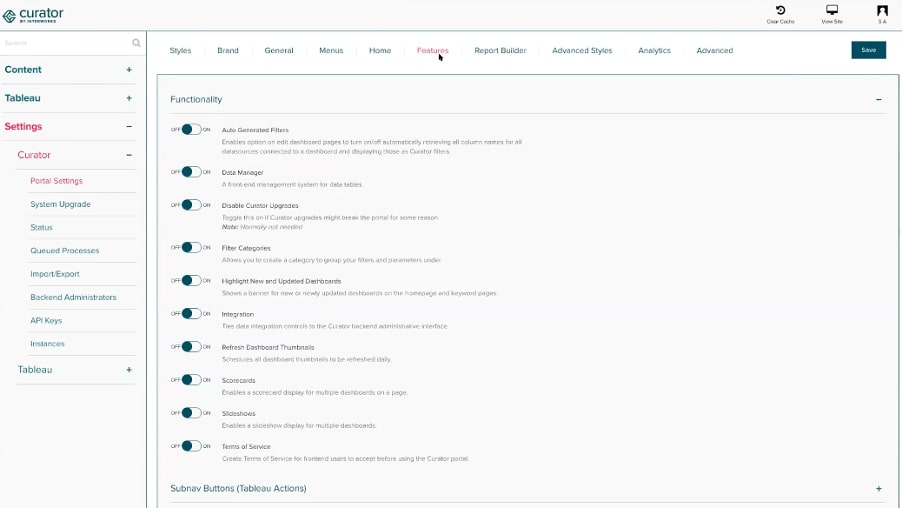
In particular, we want to highlight the Subnav options that are available and broken down into two subheadings:
- Subnav Buttons (Tableau Options) – These are things you may have seen in Tableau Server that you’d like to bring across to your Curator site. You can turn any of these toggles on/off individually, so it’s a great setting to play around with.
- Subnav Buttons (Curator Options) – Unique to Curator, we love customer feedback on things users would like to see that will improve their user experience. so where we can we have built those in.
Report Builder
One of our favorite features, we love to toggle this one on. It’s a way to export dashboards and build them into PowerPoint decks or into PDFs. You can have these sent out on a customizable schedule, send them out to other people as an email attachment and more. Go through the full features list here in a webinar replay.
Connecting Curator to Tableau Server
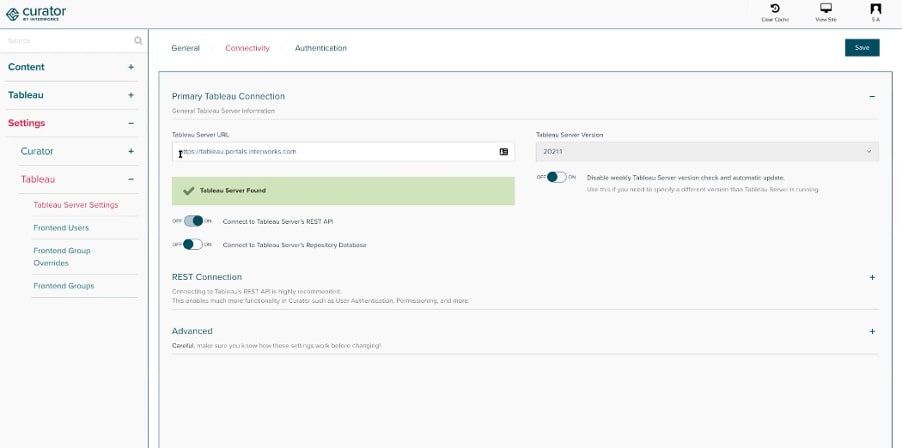
Simply input your Tableau Server URL, and the Curator site will check that it is valid and then connect to the server. The way Tableau Server does this is through an administrative user who has permissions to share the dashboards on the Curator site. Then with Tableau’s personal access tokens opposed to usernames and passwords:
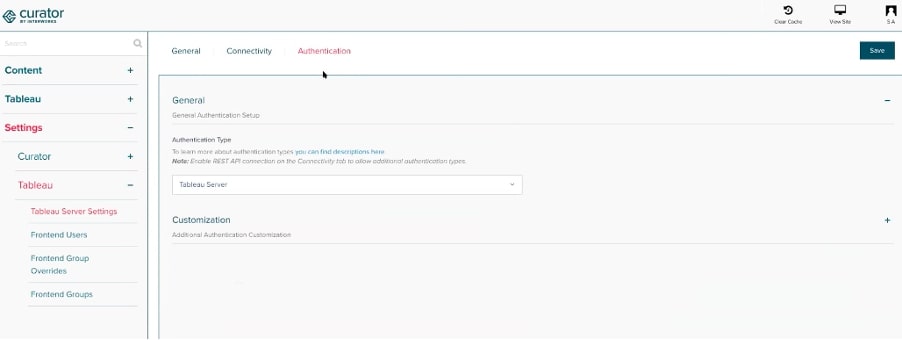
The next piece is to tell Curator how people authenticate to and access Curator, whether that be through SAML, user names and passwords, etc.
Most of this set will have been completed for you as part of your package, but we wanted to share just how user friendly it is. Now, let’s look at adding content.
Importing Content
Head over to the Tableau tab and select the first subheading of Dashboards. Here, we can start selecting the dashboards we would like to bring into the Curator site:
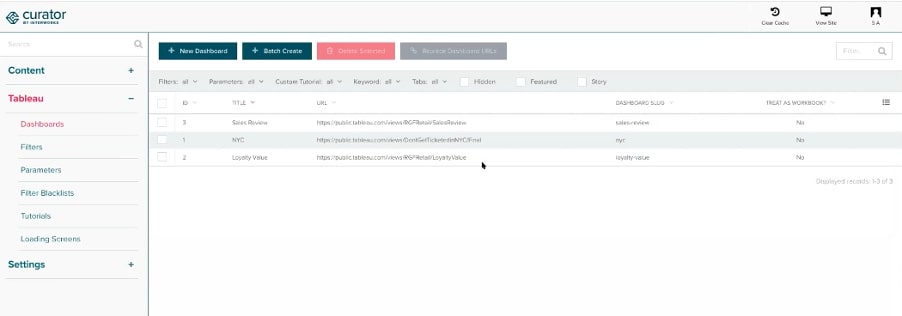
By selecting NewDashboards, you’ll see a very familiar layout (if you use Tableau Server), which will enable you to select the dashboards you would like to appear within Curator. Once you select your site, project, workbook and dashboard option, it will actually pre-populate the options available to you in a drop-down menu for you to choose from, or you can simply copy and paste it across:
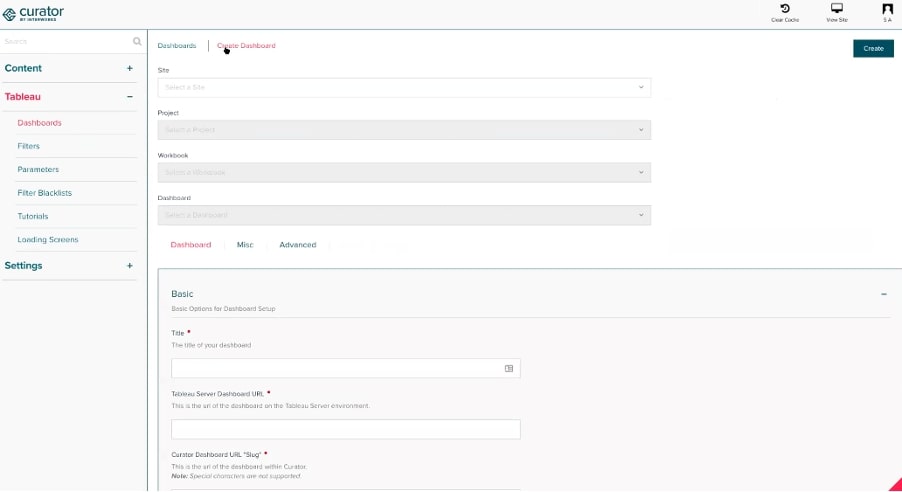
You can also plug in Tableau Public dashboards here, so dashboards used do not have to be directly on Tableau Server.
Within this page, you can also select to turn on and off dashboard tabs. Some people use them, some people don’t, and some people would use them in there if they looked better. We have options to address all of this.
We also have filter and parameter options within this section, so you can select whether you would like to hide a dashboard and just select a URL related to it. If you are familiar with the Tableau embedded scheme, you can utilize that functionality, too, even plugging in custom JavaScript:
Once you have played with the options, hit enter and voila – your dashboard will be visible. The next question is where will it be visible? We have options for you to play with the navigation order and restructure it any way that you see fit, and just like Tableau, it’s a simple drag-and-drop to move things around:
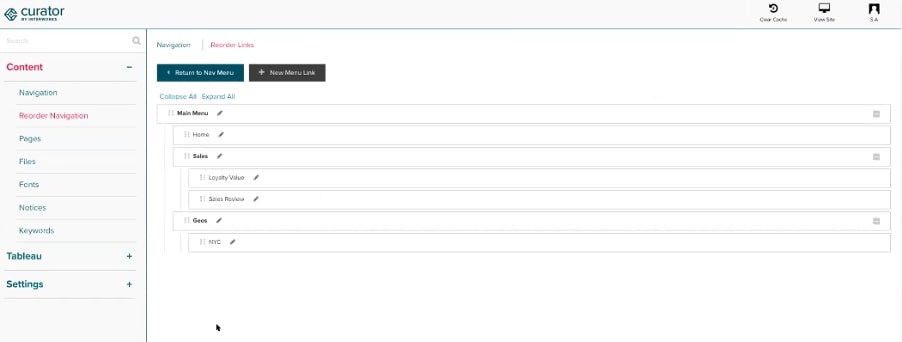
You’ll have the option to add new buckets to your navigational buttons and select whether you want them to be holding tabs or turn them into landing pages. Better still, you can select the type of link that you would like, i.e. to a file or an external URL:
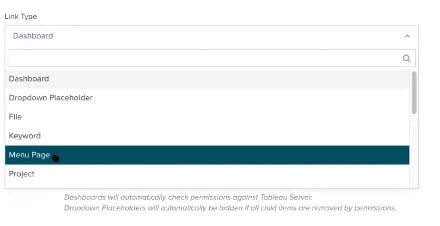
Building off of this feature, we also have different content types you can link out to:
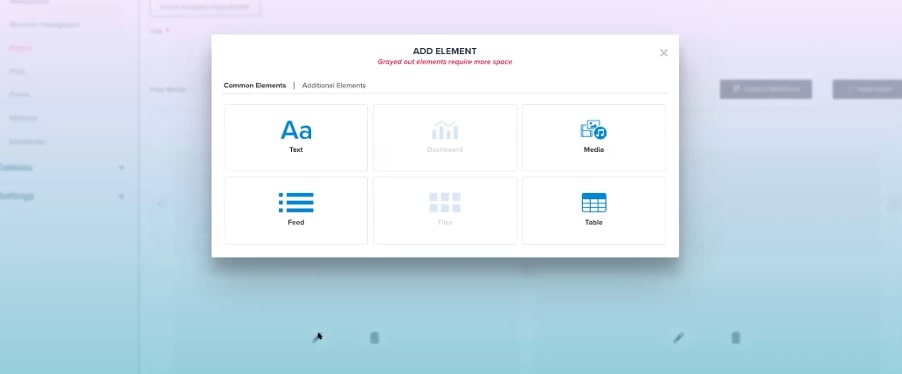
Pages – A really neat and flexible tool that allows you to create an extremely personalized view of your site. (Go in depth with our Page Builder blog post.) You can build out your own page made up of one or several elements, and you will be presented with multiple content options to choose from. You’ll be able to add text, imagery, dashboards, etc., and all of this will be available for you to build out, including embedding other systems like YouTube videos or JavaScript:
Flat Files – We see a lot of companies sharing files via email that become clogged and out of date over time. With Curator, you can upload a file and even select permissions on who can access the file, so you can restrict those who would like visibility. We are extending Tableau’s permissions from just being Tableau users to a wider group of people who may not have a Tableau license, and this kind of expansion is true for everything across your site.
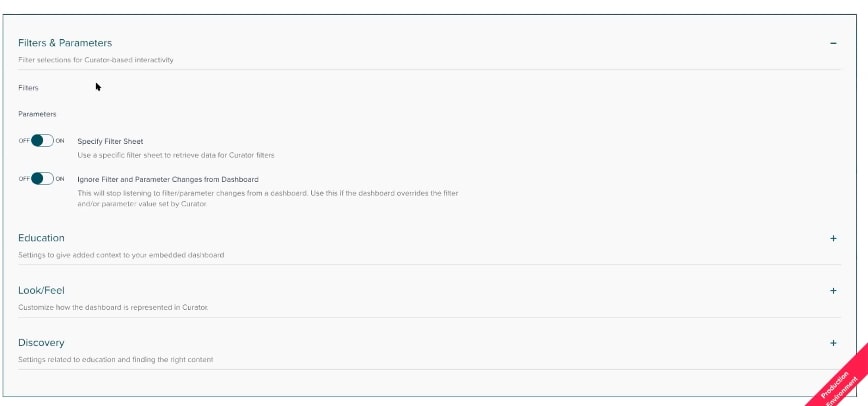
Switching back to the Tableau Filters section, you’ll be able to see how you have the option to customize the filters on your Curator site. You can choose to bring those in or create new ones. Check out our Education demo where you can see how we have created filters by region. This will also follow the user, so when they log into the platform in future, that filter will be applied automatically:
You can also create a new filter, and the Curator site will ping Tableau Server to identify if it already exists within the workbooks.
You can also do the same thing with parameters; a neat feature is that you can get this from the data as well. You can get this from the allowable list in Tableau but also from a field. You don’t have to update your Tableau dashboards to make it available to your users. You’ll also be able to toggle on/off to get this to follow your user around as they interact with the site.
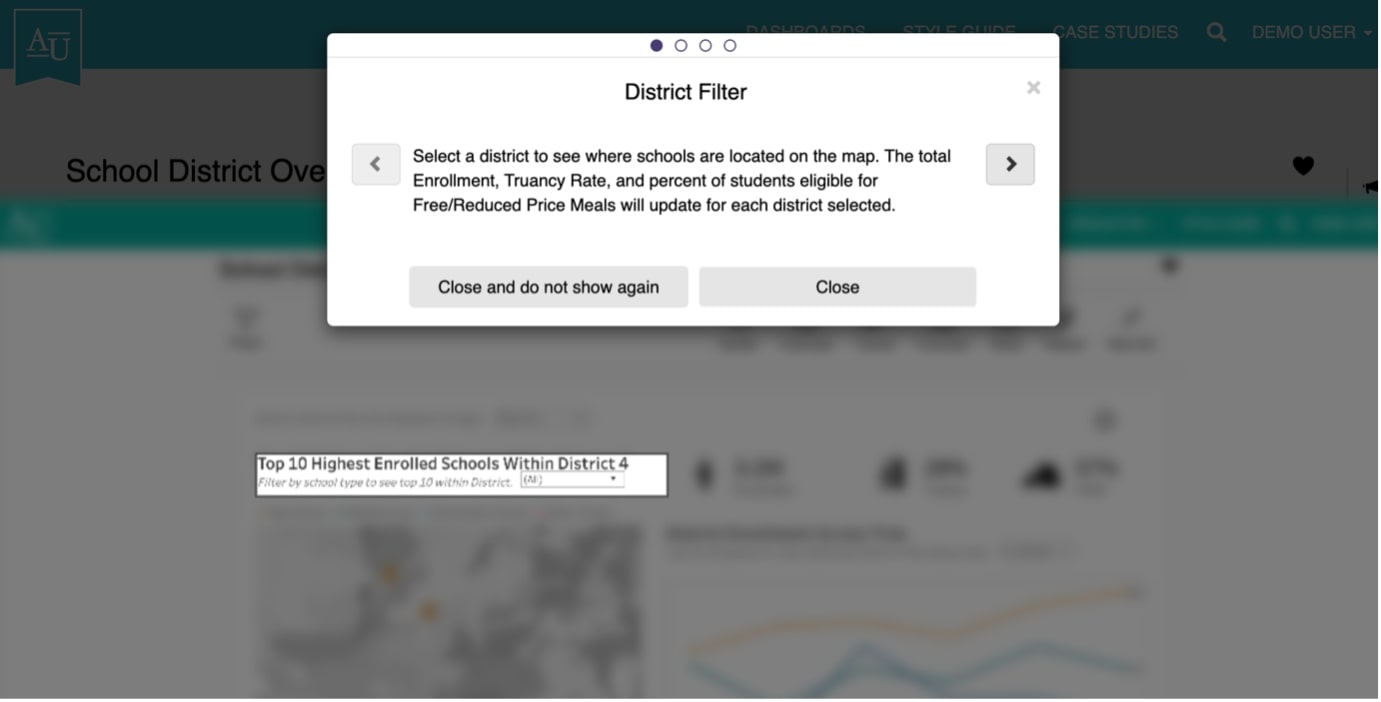
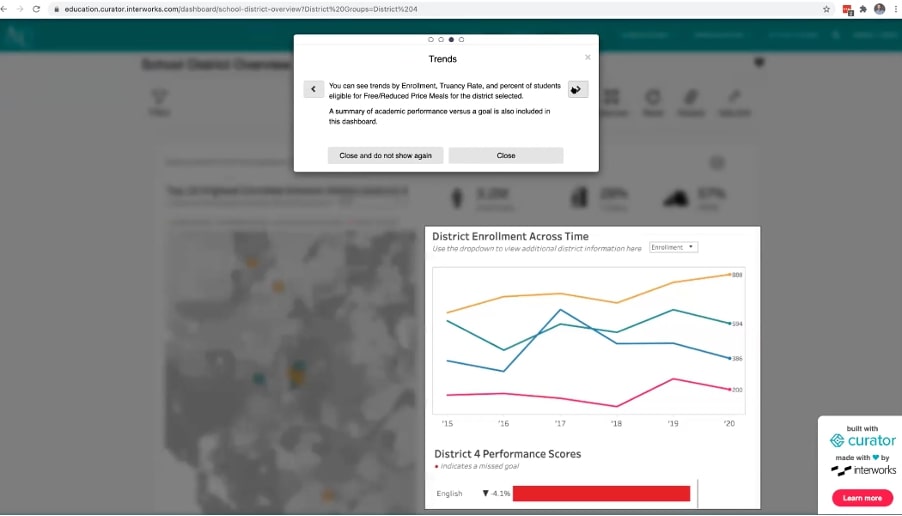
We also love the Tutorials on loading screens, which are pop-ups when you view a dashboard to tell your users how to interact with them:
We have mentioned just a few of the many features that are available to you with Curator by InterWorks, and there are so many more that can be explored! Our recommendation is to explore the rest of our Curator site where you can find a gallery of demos with tons of varied functionality to choose from. For more information, please contact us and we will be able to do a deeper dive with you. In the meantime, watch the recording from this event below:

Managing a self-hosted web platform can be time-consuming, costly, and complex. If you’re currently self-hosting Curator, migrating to our SaaS platform can unlock a world of advantages designed to make your analytics experience seamless and hassle-free, freeing your team to create further impact on your business.

Recently, Tableau has been encouraging the use of connected apps for external applications, instead of using trusted tickets. All of Tableau’s recent embedding features require connected apps. Since this only deals with behind the scenes authentication, there is no impact to the end user. In our effort to remain closely aligned with Tableau, Curator is transitioning to only using connected apps.

Curator has added the feature to be able to send mark commenting data to a webhook. With the widespread use of API integration platforms, this really opens the doorway to virtually unlimited use cases.